
Join VIP now for early pre-order access, lower prices, rebates, and reward points!
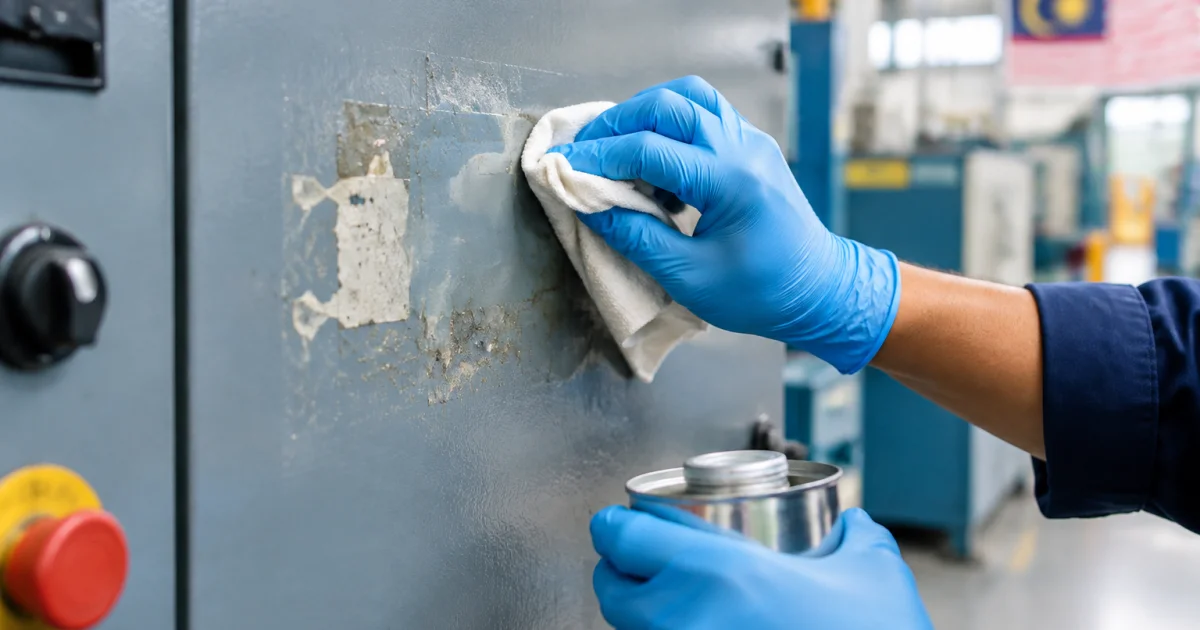
How to Use Industrial Adhesive Remover in Thailand Without Damaging Paint, Plastics, or Seals
October 17, 2026
Removing labels, double-sided tape, and adhesive residue sounds simple—until the surface is painted, the housing is plastic, or a nearby seal starts to swell. In many factories, a “stronger solvent” approach creates avoidable rework: hazed polycarbonate windows, softened gaskets, lifted paint, or sticky smears that trap dirt.
This tutorial explains how to use Industrial Adhesive Remover Thailand products safely on common industrial substrates (painted metal, plastics, rubber seals, and coated panels). It’s designed for maintenance teams and operators who need fast results without damage, with a method you can standardize for shift work and repeated changeovers.
1) Identify the surface and the adhesive (before you spray)
Most damage happens in the first minute—when a remover is applied without checking what it can attack. Do a quick assessment so you choose the mildest effective method.
Surface checklist
- Painted metal: Find out if it’s powder coat, baked enamel, or a softer field touch-up. Softer coatings mark more easily.
- Plastics: Identify if possible (PC, acrylic/PMMA, ABS, PVC, nylon). Clear plastics (especially PC and acrylic) are easiest to haze or craze.
- Rubber & elastomers: NBR, EPDM, silicone, PU can react differently. Swelling or softening is the main risk.
- Seals and adhesives nearby: Even if you’re cleaning a label, runoff can reach gaskets, O-rings, or bonded joints.
Adhesive type clues
- Label adhesive: Usually acrylic pressure-sensitive; often leaves a thin, tacky film.
- Packaging tape residue: Can be rubber-based and smears when warm.
- Double-sided foam tape: Often leaves a thicker layer and may require mechanical lift first.
- Hot-melt glue: Becomes gummy with some solvents; controlled softening works best.
Rule of thumb: if the surface is unknown plastic or a critical seal area, start with the mildest option, increase dwell time, and only step up chemistry if needed.
2) Prepare the work area for controlled, damage-free removal
Good preparation reduces chemical exposure to sensitive parts and prevents spreading residue. This is especially important on equipment panels, sensor housings, and fixtures with mixed materials.
- Ventilation: Use local exhaust or open airflow where possible. Solvent vapors can accumulate in enclosed maintenance bays.
- Protect surrounding parts: Mask edges with tape or cover adjacent seals with a removable barrier (poly sheet or clean cloth). The goal is to stop runoff.
- Choose the right applicator: Use a lint-free cloth, swab, or controlled spray nozzle. Avoid flooding.
- Tools: Plastic razor/scraper (for plastics and coatings), nylon brush, and a metal scraper only for bare metal where scratches aren’t critical.
- PPE: Gloves and eye protection suitable for solvents; follow your facility’s chemical handling practice and the product’s SDS.
If the residue is on a vertical panel, plan a wipe-on / wipe-off method rather than spraying directly. Direct spraying increases the chance of solvent getting behind trim, into switches, or onto gaskets.
3) Do a compatibility test (the step that prevents most damage)
Before full application, test on an inconspicuous spot or a spare part. This matters most for painted surfaces and clear plastics.
- Choose a hidden area (inside lip, underside, edge behind a bracket).
- Apply a small amount to a cloth (not the surface) and dab the test area.
- Short dwell time first: 10–20 seconds, then wipe dry.
- Inspect immediately: Look for color transfer to cloth, gloss change, whitening, softening, or tackiness.
- Recheck after 5–10 minutes: Some plastics show delayed hazing/crazing; some paints soften over time.
If you see any change, stop and switch to a milder approach: reduce dwell time, use a different remover designed for sensitive plastics, or move to mechanical lift plus mild cleaner.
4) Step-by-step method: remove adhesive without lifting paint or swelling seals
The safest workflow is to remove in layers: lift bulk material first, then dissolve the thin film, then neutral-clean the surface.
Step 1: Lift the bulk (mechanical first, not chemical first)
- Peel what you can by hand. If it tears, warm the label/tape slightly (gentle heat) to help release.
- Use a plastic scraper at a low angle to lift foam tape or thick residue. Keep pressure light to avoid scratching paint and plastics.
- Collect debris as you go so it doesn’t smear when solvent is applied.
Step 2: Apply adhesive remover in a controlled way
- Apply to the cloth first for sensitive areas. For robust painted metal panels, a controlled spray can be acceptable—avoid soaking edges and seams.
- Work small sections (e.g., 10 cm x 10 cm). This keeps dwell time consistent and prevents the remover from drying and redepositing.
- Let it dwell briefly. The goal is to soften the adhesive, not to bathe the substrate.
- Wipe in one direction, flipping the cloth frequently. This prevents pushing dissolved adhesive back into the surface texture.
Step 3: For stubborn residue, use “repeat cycles” rather than longer soak
Long soaking is where plastics haze and seals swell. Instead:
- Do 2–4 short cycles of apply/dwell/wipe.
- Use a fresh cloth section each cycle.
- Lightly agitate with a nylon brush only if the surface texture can tolerate it.
Step 4: Final cleanup to remove solvent and prevent re-tack
After the adhesive is gone, remove the remover. If not, the surface may remain slippery, attract dust, or become tacky again.
- Wipe with a clean, dry cloth first.
- Then wipe with a suitable follow-up cleaner. Many teams use an Industrial Alcohol Cleaner Thailand type product for a final wipe because it flashes off and helps remove light films (verify compatibility with plastics and paint via the same patch-test approach).
- Allow the surface to fully dry before re-labeling, painting, or applying new tape.
5) Surface-specific tips (paint, plastics, and seals)
Use these adjustments to reduce risk on common factory substrates.
Painted panels and powder-coated equipment
- Avoid aggressive scrubbing: gloss change often comes from abrasion, not chemistry.
- Watch for paint transfer to the cloth during the test. If you see it, shorten dwell time and switch to a milder remover.
- Do not use metal scrapers on visible areas—scratches become corrosion initiation points later.
Plastics (clear covers, housings, labels on control boxes)
- Assume sensitive until proven otherwise, especially for clear parts.
- Use wipe-on, minimal liquid, and the shortest dwell time that works.
- Avoid pooling at edges where stress can concentrate and cause crazing.
- If you need to restore appearance on metal after residue removal, use a product intended for that job—some teams prefer an Industrial Metal Polish Gel Thailand type product on suitable metals (not plastics), but polish only after the chemical residue is fully removed.
Rubber seals, gaskets, and O-rings
- Prevent contact whenever possible—mask seals, apply remover to cloth, and keep the work zone tight.
- Limit exposure time: quick wipe cycles are safer than soaking.
- Inspect after cleaning: swelling, softening, or a “spongy” feel means the chemistry is not compatible.
6) Troubleshooting: common problems and how to fix them
If residue removal is slow or leaves marks, the fix is usually technique, not “more solvent.” Use the table below to diagnose quickly.
| Problem | Likely cause | Safer fix |
|---|---|---|
| Adhesive smears and spreads | Too much liquid; cloth saturated; wiping too broadly | Work smaller sections; apply remover to cloth; flip cloth frequently; do short repeat cycles |
| Hazy plastic window after cleaning | Incompatible solvent; dwell too long; pooling at edges | Stop; switch to plastic-safe method; reduce dwell; wipe-on only; test first on spare part |
| Paint looks dull or has “rub marks” | Abrasion from scrubbing; too aggressive pad | Use softer cloth; minimal pressure; let chemistry do the work; repeat short cycles |
| Sticky feeling returns after drying | Dissolved adhesive film left behind | Final wipe with clean cloth then alcohol-based final wipe (compatibility tested); change cloths more often |
| Seal edge feels swollen | Runoff contacted elastomer; over-application | Mask seals next time; apply to cloth; reduce volume; verify compatibility; consider replacing if function-critical |
Also check whether the residue is actually adhesive. Some “sticky” contamination is oil mist, coolant film, or dust trapped in plasticizer. In those cases, an adhesive remover may not be the best first choice; a suitable degreaser or alcohol cleaner may work better after testing.
Choosing the right product type for factory use in Thailand
Not all removers are the same. When you’re selecting an industrial adhesive remover for regular plant use, prioritize controllability and documentation—not just strength.
- Application format: controlled spray, liquid for wipe-on, or gel for vertical surfaces. Gels reduce runoff risk near seals and edges.
- Material compatibility guidance: look for clear instructions for plastics and elastomers; always verify with your own patch test.
- Residue behavior: removers that dissolve adhesives but leave an oily film may require a dedicated final wipe step.
- Documentation: SDS and technical datasheets help you standardize procedures and train operators.
- Process fit: if you are removing labels before repainting or applying a release coating in a high-temperature process, ensure the final wipe leaves the surface clean and ready for the next step (for example, a high temperature release agent or silicone release coatings used downstream may require a clean substrate to perform consistently).
If your team already uses maintenance sprays like penetrating oil, keep them out of the adhesive-removal workflow. Penetrating oil sprays are designed to creep into threads and tight gaps; that same creeping action can contaminate surfaces where you need new tape/labels to bond, or where cleanliness matters.
Conclusion: standardize a safe, repeatable adhesive-removal process
A safe adhesive-removal process is a combination of surface identification, compatibility testing, and controlled application. Start with mechanical lift, use short wipe-on cycles, and finish with a clean-down step to prevent re-tack and contamination. When you train operators to work small sections and avoid soaking plastics and seals, you protect finishes, prevent leaks, and reduce rework—while still removing residue quickly enough for production realities.
For teams in Thailand sourcing reliable chemicals, choose an adhesive remover with clear documentation and consistent performance, and build a simple work instruction around the steps above.
Related product: Sk 192 Adhesive Remover
Browse more options: For Industrial Use
Frequently Asked Questions
Can industrial adhesive remover damage powder-coated paint?
Yes. Some formulations can soften certain paints or dull the finish, especially with long dwell time or aggressive scrubbing. The safest approach is a small patch test, short dwell (seconds, not minutes), and repeat wipe cycles instead of soaking. Also use a soft, lint-free cloth to avoid abrasion marks.
What is the safest way to remove sticker residue from clear plastics (PC or acrylic)?
Treat clear plastics as sensitive: apply remover to a cloth (not directly to the part), use very short dwell time, and wipe in small sections. Avoid pooling along edges and seams, and confirm compatibility with a hidden-area test first. If any haze or whitening appears, stop and switch to a milder method.
Why does adhesive residue turn into a sticky smear when I wipe it?
This usually happens when too much liquid is applied and the dissolved adhesive spreads across the surface. Reduce the amount of remover, work smaller areas, and flip/change cloths frequently. Use multiple short apply–wipe cycles rather than one long wet wipe.
Should I finish with an alcohol cleaner after using adhesive remover?
Often, yes—after the adhesive is removed, a final wipe can help remove remaining film and improve cleanliness for re-labeling. Many factories use an alcohol-based cleaner, but you should still patch-test it for the specific paint or plastic to confirm it won’t haze or dull the surface.
Is a penetrating oil spray a good substitute for adhesive remover?
No. Penetrating oils are designed to creep into tight gaps and can leave residues that interfere with new labels, tapes, coatings, or cleanliness requirements. Use a purpose-made adhesive remover for residue, then perform a controlled final clean so the surface is ready for the next process step.
Source factory-safe adhesive removers with A-Isou
Need a repeatable way to remove labels and tape residue without risking paint, plastics, or seals? A-Isou helps maintenance and procurement teams in Thailand source industrial adhesive removers, cleaners, and supporting documentation (SDS/technical datasheets) from multiple suppliers—so you can compare options and standardize your process.
